After hours of piecing together articles and testing things on my own templates, I bring to you my tried-and-true method of using the new Block Bindings UI!
Block Bindings API
In the simplest terms, the Block Bindings API, introduced in WordPress 6.5, allows blocks to display data from custom fields.
Block Bindings UI
The Block Bindings UI was integrated into the WordPress core in version 6.7. This allows you to bind custom data to a block by selecting an attribute in the right column of the editor.
Which blocks allow bindings?
At this time, only the following blocks and their attributes are supported:
| Blocks | Attributes |
|---|---|
| Paragraph | content |
| Heading | content |
| Image | url, alt, title, id, caption |
| Button | url, text, linkTarget, rel |
| Navigation | url |
| Post Date | datetime |
What do I need?
- WordPress, at least version 6.7, which is when the Block Bindings UI was introduced. But don’t use an old version, update to the latest, which at this moment, is 7.0
- Advanced Custom Fields (ACF) (or an equivalent custom field plugin). WordPress also has built-in custom fields, but configuration instructions should be similar.
- WPCode (or equivalent plugin). A little PHP code will need to be added, so a plugin will help avoid touching the theme PHP files.
Add a custom field to a template
Let’s start by using ACF to add a single custom field to only show on pages.
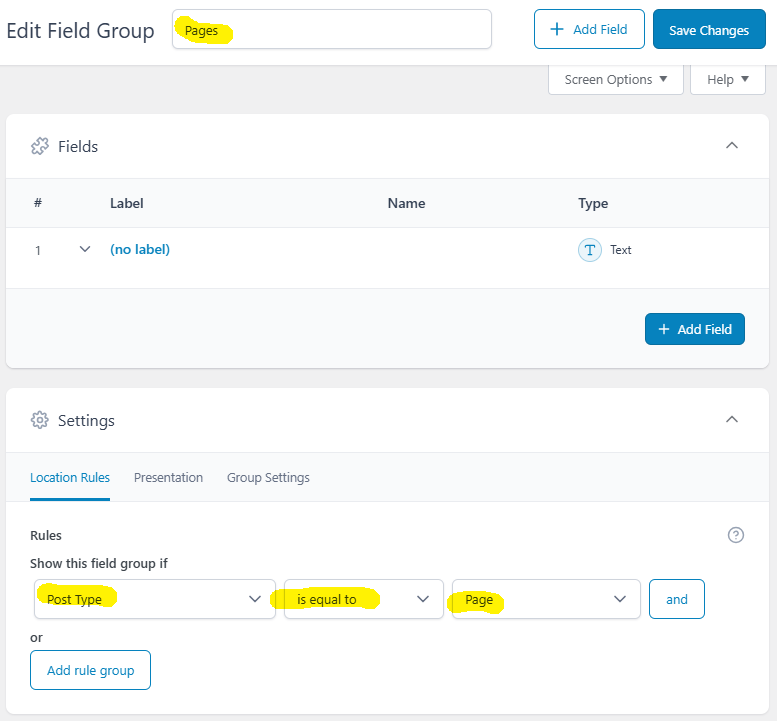
In WordPress Admin, go to ACF > Field Groups, then Add New. Name it whatever you want, but choose a name that reminds you where the fields are. In this case, the fields will only display on pages, so I’ve named it “Pages.”
Under Settings > Location Rules, set a rule:
Show this field group if Post Type is equal to Page
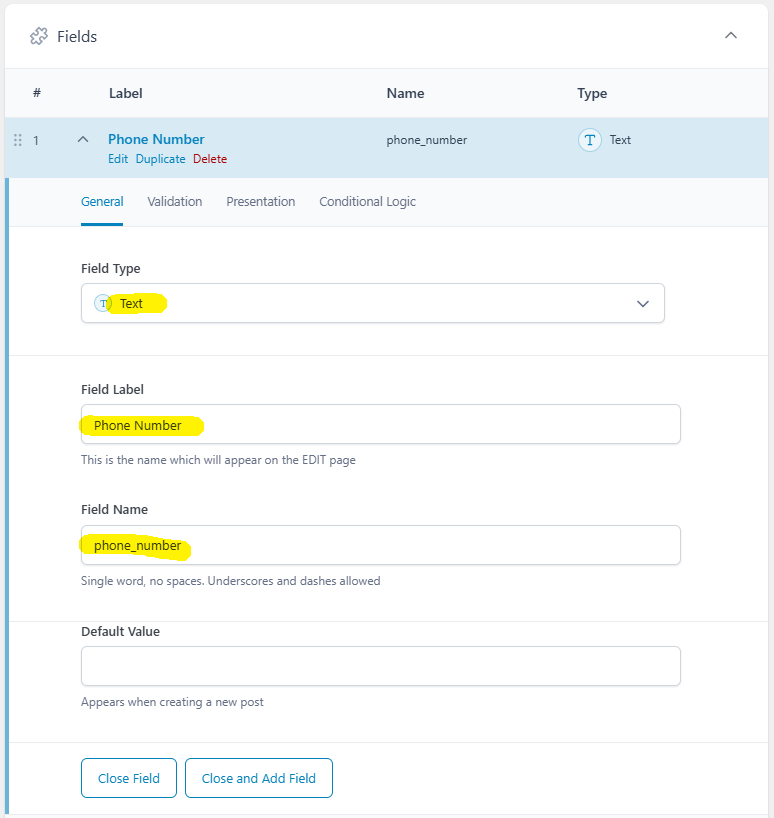
Now we will add a single field, called “Phone Number.”
Fields > General
- Field Type: Text
- Field Label: Phone Number
- Field Name: phone_number
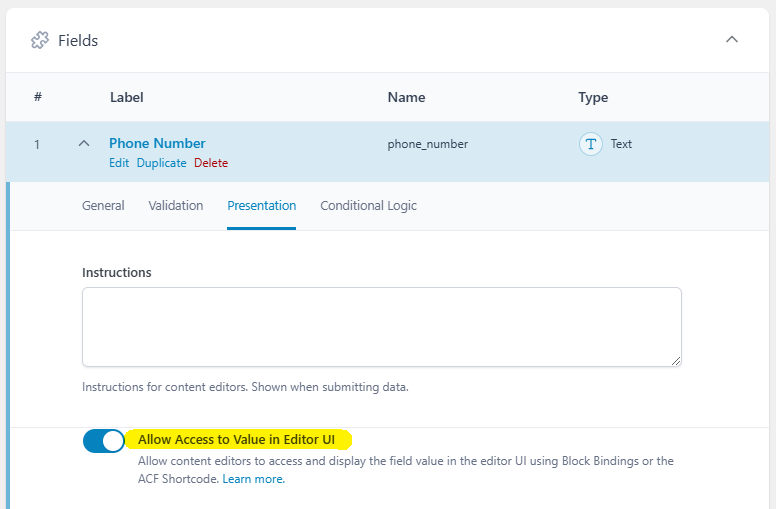
Important: The following option must be checked for the Block Bindings UI to read the data.
Fields > Presentation
- Allow Access to Value in Editor UI: Checked
Settings > Group Settings
- Active: Checked
- Show in REST API: Checked
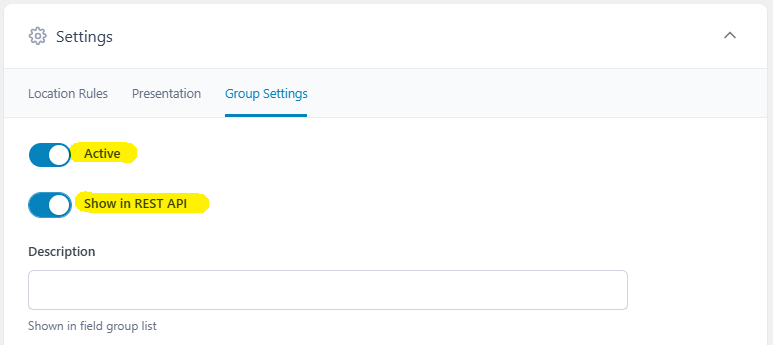
Now Save Changes. The rest of the settings are mostly visual, and can be adjusted as you wish.
Place a custom field in a template
Let’s make a very simple custom template that uses this new Phone Number field. There are two ways to get there.
Appearance > Editor
or
Appearance > Themes > Customize
Both go to the same Design screen with Navigation, Styles, Pages, Templates, and Patterns.
- Choose Templates.
- Add New Template, then choose Custom template.
- Name it “Client Template.” If the screen asks to choose a pattern, just Skip.
- Put down three blocks: Title, Paragraph, and Content.
- Click “Save”
Register Custom Fields
This is a very important step. Go back to the main WordPress admin area. Add the following to a code editor or the theme’s functions.php file:
add_action( 'init', 'register_meta_for_block_bindings' );
function register_meta_for_block_bindings() {
	register_meta( 'post', 'phone_number', [
		'show_in_rest'  => true,
		'single' => true,
		'type' => 'string',
		'sanitize_callback' => 'wp_strip_all_tags',
		'label' => '[Location URL]',
		'default' => ''
	] );
}
Notice the “phone_number” value. That is the name of the custom field. The first three attributes, “show_in_rest”, “single”, and “type” are required for this to work. The rest are recommended, but optional.
Save and publish the file, or activate the snippet.
To be continued…